Blog

  • Pi Day

    I’d completely forgotten about Pi day until I saw someone post about it online and I thought I should write about the happy coincidence that I’ve been working with a Raspberry Pi today.

    Raspberry Pi 3 A+ board inside opened enclosure.

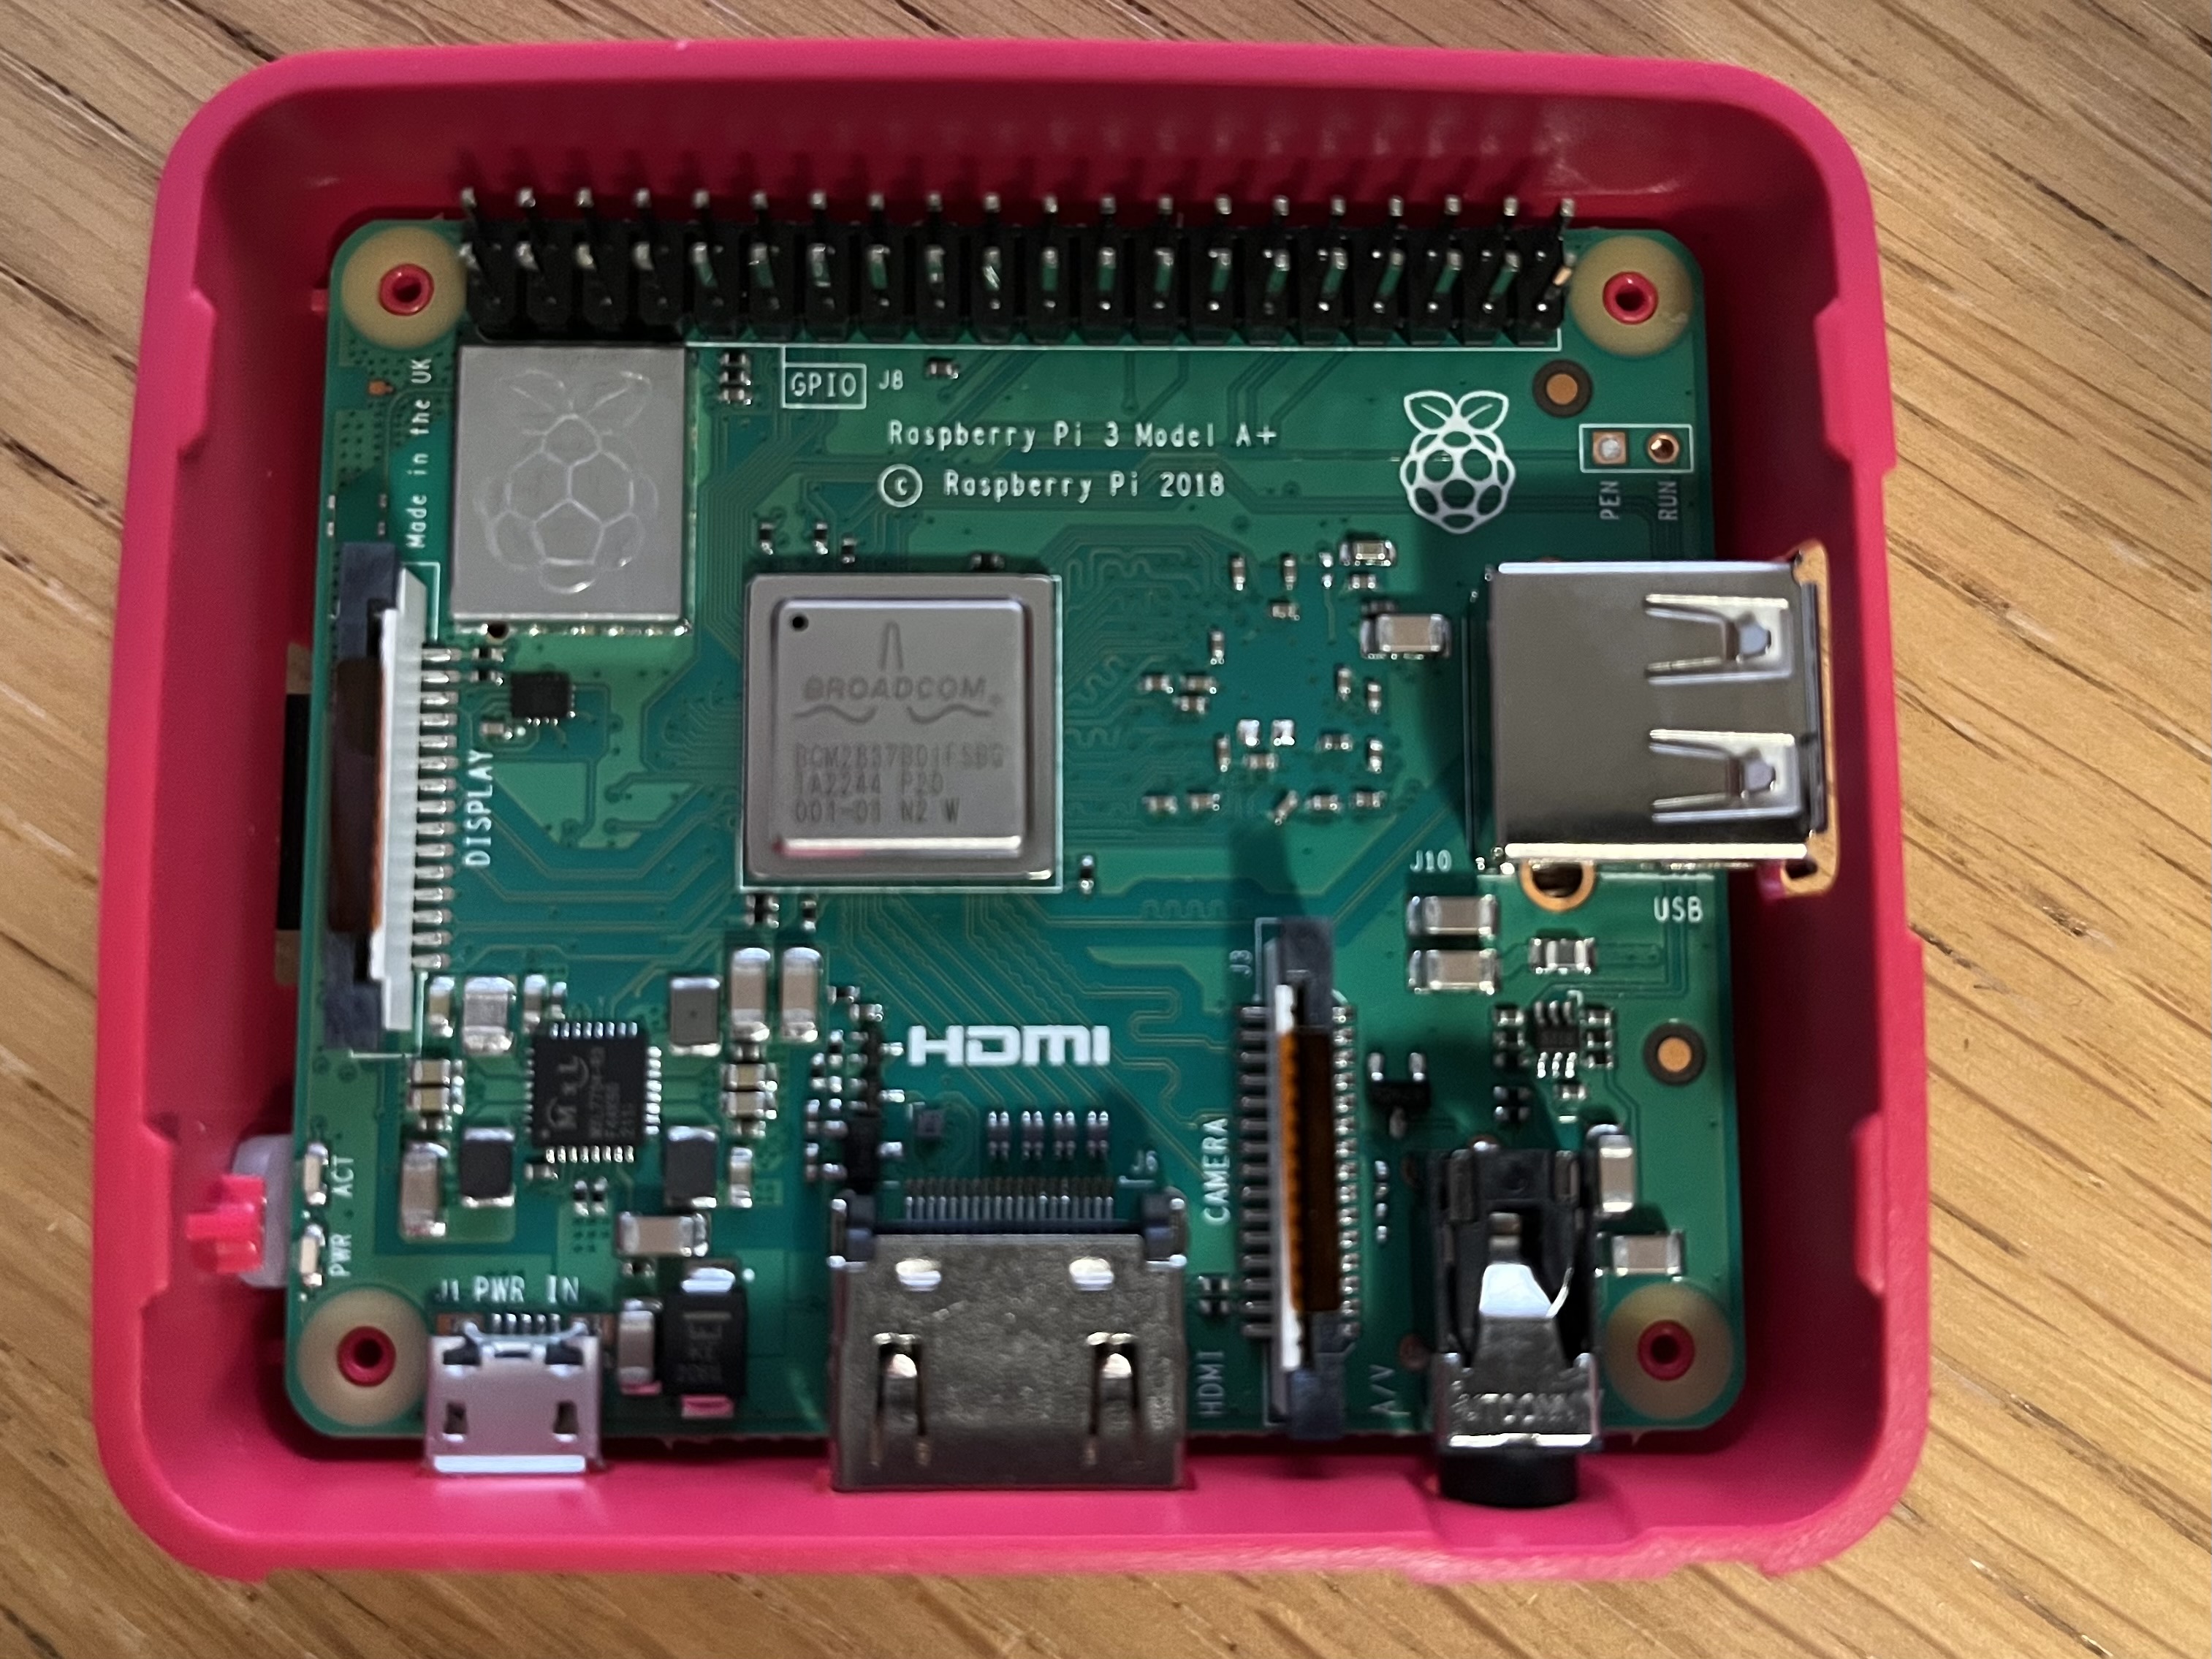
    Last week I took delivery of a new Raspberry Pi. I have an older Pi 2 but I wanted to have a newer unit to allow me to develop 32feet.NET for Linux and the Raspberry Pi is a compact and simple device to setup for this purpose. There are still supply issues with the latest models but I was able to get a Raspberry Pi 3A+. The A is a shrunken form factor which is ridiculously small but only has one USB socket. I bought a kit from Pi Hut which included a power supply and case. I invested in the Raspberry Pi keyboard at the same time as this has a built in USB hub so that you can daisy-chain in a mouse and other peripherals. Because it has built in Wi-Fi the only other thing I had to plug in was an HDMI cable to a spare display. The Raspberry Pi 3 and 4 both have a built in Bluetooth adapter and both can run the ARM64 builds of Raspberry Pi OS.

    Setting up the microSD card was straight-forward as long as you don’t pick the default Raspberry Pi OS image (which is 32-bit) and get the 64bit one. BlueZ, the official Bluetooth stack for Linux, is already included so the Bluetooth works out of the box. I needed to install the .NET SDK, enable SSH and then I was able to debug remotely from Visual Studio.

    The process is not quite as slick as remote debugging an Android or iOS app. You have to build your code, then you need to deploy it to the Pi. To do this I used scp (Secure Copy). There is a process to follow to setup an SSH key and copy it to the Pi so that you don’t have to authenticate with a password to connect via SSH and this applies to scp too. The scp command lets you copy one or more files from the host PC to a directory on the Pi (you’ll want to create a directory on the Pi to run your new app from). You can also download files in the other direction if you need to get data back from the Pi after running the app.

    Now you have the app deployed you can use the command line on the Pi to run the app using the dotnet command e.g.

    dotnet MyApplication.dll

    What I did was start the program off and wait for input, to give me time to connect the debugger then I can continue when ready. It’s just a straight-forward console app.

    Console.WriteLine("Hello World!");
    var inputString = Console.ReadLine();

    For debugging from Visual Studio you go to Debug > Attach to process… Select SSH as the connection type and enter or find your Raspberry Pi device – the format is the SSH login of user@hostname. When you’ve connected you’ll see a list of processes running on the remote device and you should see one which begins “dotnet”. Click Attach and wait for the debugger to attach, setup breakpoints and load symbols. Once the activity dies down in the Output window you can type any text into the Pi command line and press enter and let the magic begin.

    I’ve started by incorporating Linux.Bluetooth (previously known as Plugin.BlueZ) as this wraps most of the required Bluetooth LE functionality from the underlying DBus API. As I delve more into this I’ve had to poke around in DBus itself using Tmds.DBus. There is a useful study guide at the Bluetooth SIG which shows how it all works. Hopefully soon I’ll have the Linux support ready in preview form and it can be tested on other devices. Please get in touch through GitHub if you’d like to help out.

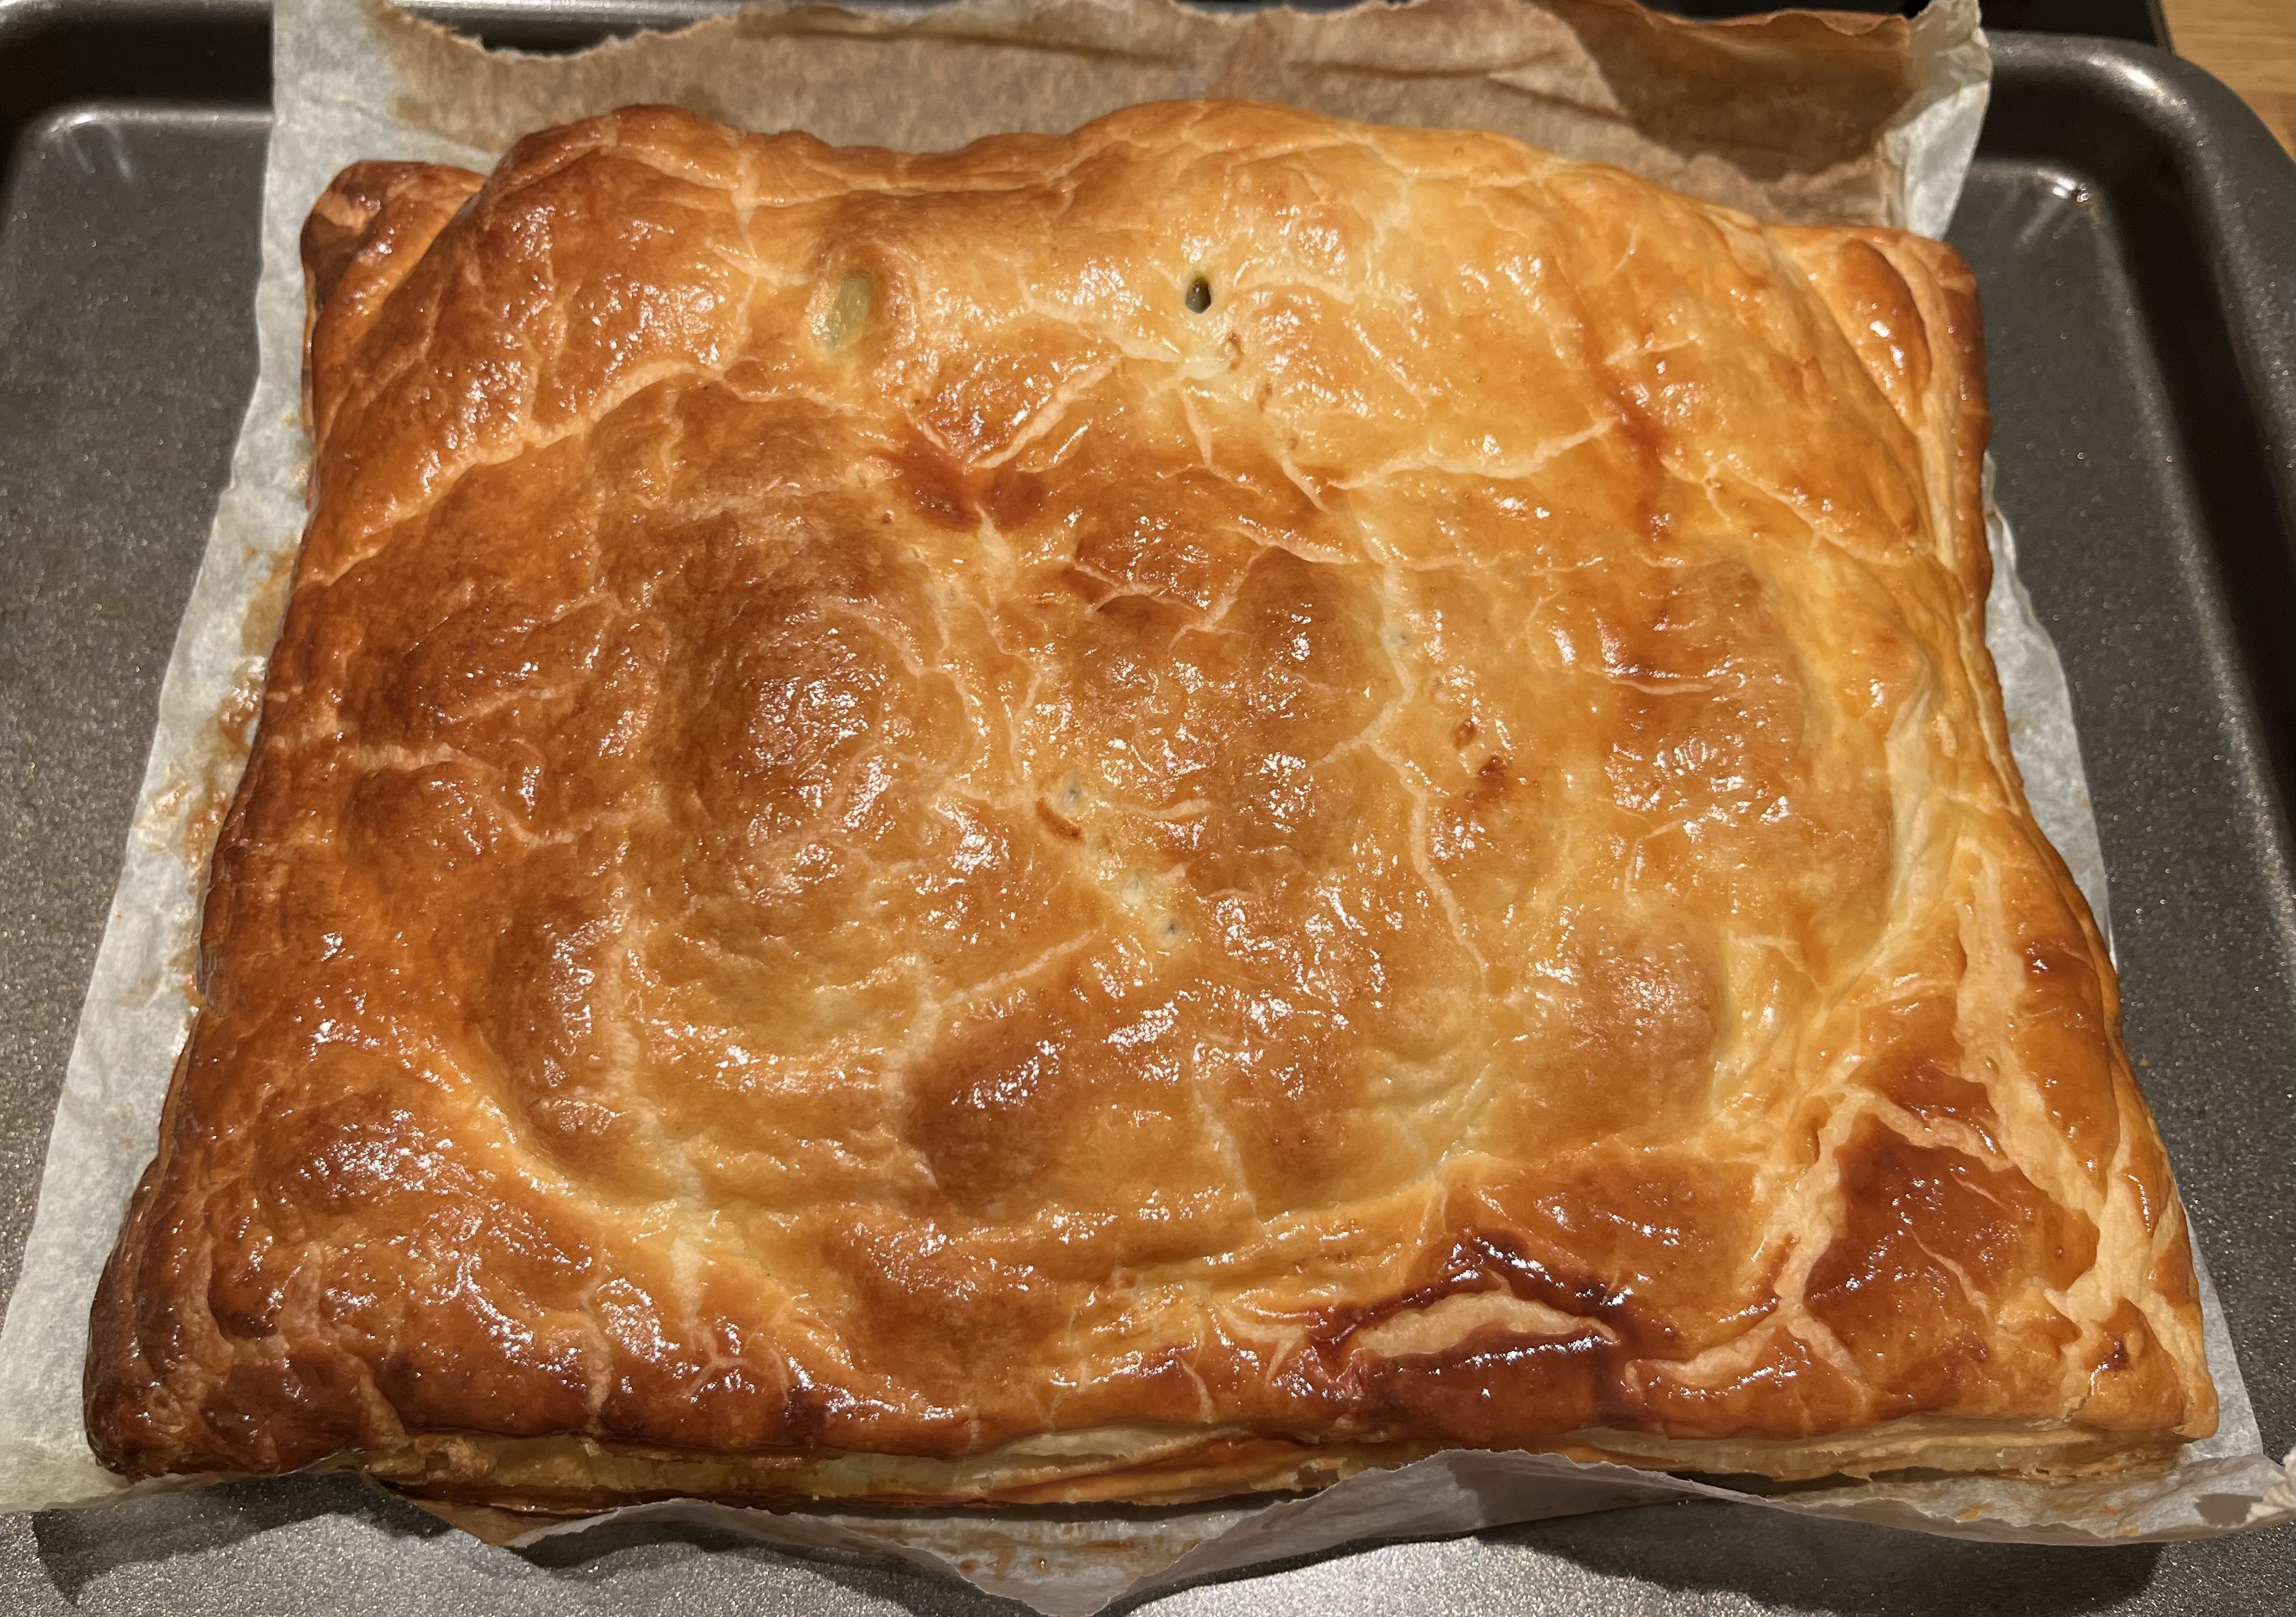
    Oh, and coincidence number 2? I’d already planned to make a Pie for dinner tonight before realising the date – Yummy!

  • Bluetooth Support for Android on More Frameworks

    There is a particular issue when writing any code which will run on Android which presents external UI through an Intent or uses broadcasts in that you need to have a reference to the current Activity. I covered this in my last post.

    Following on from that I moved the code to a new library (since it is required in both the Bluetooth Classic and Bluetooth LE libraries). It now provides a simple API which you can use to determine the current Activity without adding any framework dependencies.

    InTheHand.AndroidActivity.CurrentActivity

    The code can determine this on Xamarin Forms, .NET MAUI and Uno Platform. I haven’t figured out if there is a clean way to do this on Avalonia yet but there is a simple workaround for everything currently unsupported – including if you want to use the libraries from “native” Xamarin Android or .NET 6.0 Android and beyond.

    Every Android project contains a main Activity. For an Avalonia mobile app this is in MainActivity.cs and is an empty class derived from AvaloniaMainActivity. Simply override the OnCreate method like so:-

    protected override void OnCreate(Bundle savedInstanceState)
    {
       // provide reference to current activity
       InTheHand.AndroidActivity.CurrentActivity = this;
    
       base.OnCreate(savedInstanceState);
    }

    Note that to use Bluetooth you also need to add code to your activity to request permission but I’ve excluded this for clarity. So now InTheHand.Net.Bluetooth 4.0.34 and InTheHand.BluetoothLE 4.0.33 are fully supported on Avalonia or any native .NET projects.

    You can reuse this logic yourself using the InTheHand.AndroidActivity NuGet package. I’ll keep it updated to support any new or updated frameworks.

  • Dot Net DLLs, Droid, Dependencies

    Bears, Beets, Battlestar Galactica meme from The Office TV Show

    Natively, Android apps are built around activities. These are distinct parts of an application which include UI and are designed to perform a particular task. Android allows you to start activities and pass data between them. A number of system dialogs are just activities which run and return a result.

    Across Platforms

    When using a cross-platform framework, whether it be Xamarin Forms, Uno or .NET Maui your app will generally have only a single Activity. You can create a complex application and never touch the template generated activity code. However when you want to call into an Activity, whether it be your own, a third-party library or a system feature, you need to have a reference to your current activity in order to launch another.

    Each framework has its own method to help with this. On Xamarin Forms this is exposed in the Xamarin.Essentials library – Xamarin.Essentials.Platform.CurrentActivity. When migrating to .NET Maui this moved to the Microsoft.Maui.Essentials library – Microsoft.Maui.ApplicationModel.Platform.CurrentActivity. The new project templates add a line of code to the default MainActivity to initialize this and store a reference to the running activity.

    On Uno the Uno base library includes Uno.UI.ContextHelper.Current which stores a reference to the activity and is initialised in the base Microsoft.UI.Xaml.ApplicationActivity class.

    What’s the point of all this?

    If we want to create a .NET library which works on all these different frameworks and has access to the activity we have some work to do. We can’t create a NuGet targeting different frameworks because these are all net6.0-android – you can’t specify the UI tech. We don’t want to provide multiple virtually-identical libraries tweaked for each framework, but we also don’t want to reference multiple dependencies in one library. The solution is a bit of good old-fashioned reflection. By checking for the presence of each of these types we can query the property and have our activity reference to use as required. Of course, none of these may be present. It’s entirely property our library is used from a “native” .NET Android app and the developer is working directly with the Android APIs. We can still provide a valuable API here but provide a method to pass the activity context to any API which requires it to display some UI. That allows us to cover all bases from a single dll for all “flavours” of .NET Android development. From your cross-platform code it’s entirely transparent. I’ve put my current code into a Gist here:-

    public static bool TryGetCurrentActivity(out Activity activity)
    {
    activity = null;
    #if NET6_0_OR_GREATER
    // check for Uno without taking a hard dependency
    var t = Type.GetType("Uno.UI.ContextHelper, Uno, Version=255.255.255.255, Culture=neutral, PublicKeyToken=null", false, true);
    if (t != null)
    {
    activity = (Activity)t.GetProperty("Current", System.Reflection.BindingFlags.Static | System.Reflection.BindingFlags.Public).GetValue(null);
    }
    else
    {
    // try Maui Essentials if not
    t = Type.GetType("Microsoft.Maui.ApplicationModel.Platform, Microsoft.Maui.Essentials, Version=1.0.0.0, Culture=neutral, PublicKeyToken=null", false, true);
    if (t != null)
    {
    activity = (Activity)t.GetProperty("CurrentActivity", System.Reflection.BindingFlags.Static | System.Reflection.BindingFlags.Public).GetValue(null);
    }
    }
    #else
    // check for Xamarin.Essentials without taking a hard dependency
    var t = Type.GetType("Xamarin.Essentials.Platform, Xamarin.Essentials, Version=1.0.0.0, Culture=neutral, PublicKeyToken=null", false, true);
    if (t != null)
    {
    activity = (Activity)t.GetProperty("CurrentActivity", System.Reflection.BindingFlags.Static | System.Reflection.BindingFlags.Public).GetValue(null);
    }
    #endif
    return activity != null;
    }

    Next Steps

    The good news from this is that InTheHand.BluetoothLE (as of the next NuGet drop) no longer has Xamarin or Maui dependencies but works just the same on these platforms. I’m interested in extending this to support Avalonia too. I may also move the code into its own library as I envision using it from a few places and it will be easier to maintain.

  • Manage a Parking Lot with Azure Sphere

    Manage a Parking Lot with Azure Sphere

    This article was originally written in 2018 and there have been many updates to Azure Sphere between then and now so some changes may be required. I thought it would be useful to share this as-is (and the code) in case it was of use to others who wanted to take advantage of an ultrasonic sensor and the Azure Sphere development kit.

    Azure Sphere is a secure microcontroller (MCU) development kit that is designed to work with Azure IoT services. This project demonstrates how it could be used to remotely manage a parking garage. It uses an ultrasonic sensor to detect the presence of a vehicle. By sending data back to Azure IoT Hub, an operator can remotely see which parking spaces are occupied. The sensor will also be used to assist the driver when parking the vehicle by providing a traffic light system to indicate when it is neatly parked.

    What we’ll need

    This solution uses the Azure Sphere MT3620 Development Kit, the MT3620 Grove Shield, and a Grove Ultrasonic Ranger.

    Azure Sphere MT3620 Development Kit Grove Shield

    The shield has six Grove compatible connectors with two GPIO ports, two I2C, one analogue, and one serial UART. It has a small cut-out section to provide access to the buttons on the MT3620 board, which helps with orienting it when assembling.

    Before starting this build, you should have set up the Sphere development kit and deployed a basic Azure IoT Hub template app to ensure that everything is configured correctly with the device.

    Assembling the parts

    The Grove Shield for the MT3620 attaches to the two header rows on top of the board. The standard Grove cable for the ultrasonic ranger clips into GPIO0 on this shield and the other end clips into the ranger board. For purposes of testing, we’ll have the board connected via USB for power and debugging. The board can also be powered by a dedicated 5V power supply.

    Programming for Azure Sphere

    Code for Azure Sphere is written in C. Because Sphere is built around a custom Linux core, it supports a number of standard POSIX APIs and a set of standard headers are added with the standard project template. The Sphere SDK contains an API for working with GPIO pins along with a Logging API that can display output in the Visual Studio debug output window. You can scan for Wi-Fi and change settings via a dedicated API or use the azsphere command-line tools from a development machine. Each open resource is represented by a File Descriptor, a unique handle that must be closed to allow the resource to be reused. The Sphere Dev Kit includes 76 GPIO pins on the header that can be used for input or output. A pair of built-in buttons and four RGB LEDs are also represented by GPIO pins.

    Each Sphere application has an application manifest where you declare ahead of time what features you require access to. If you don’t specify each GPIO you will use in this file, the GPIO_OpenAsOutput or GPIO_OpenAsInput call will fail with error EACCES.

    Using the ultrasonic sensor

    Grove Ultrasonic Ranger

    The ultrasonic sensor used here is designed for the Grove modular system, but you can also get ones that are wired manually. It has two devices that look like speakers. One transmits an ultrasonic pulse; the other is a receiver. The sensor allows you to measure the distance to an object from the time it takes for the pulse to leave the transmitter and bounce back to the receiver. The specification says it can measure up to 4 meters. This is more than enough to monitor a parking space. In prototyping, I found that it is accurate down to about 2 cm, which is just right for this scenario because we want the driver to leave at least a 2 cm gap between their car and the wall!

    The programming model of Sphere is quite basic and doesn’t support interrupts, so you have to poll to check for a signal. In fact, it’s awkward, because there is a single pin used to send a pulse and measure the response. You have to open the pin, raise the voltage high for 10 microseconds, then close the pin so that you can use it again as an input.

    In order to time the duration of the ultrasonic pulse, we have to measure the time taken from the input pin first going high to when it drops back to low again. This can be done by calling clock_gettime at these points and then subtracting the start time from the end to get the duration in nanoseconds. We know that sound takes approximately 29 microseconds to travel a centimetre, so the ping travels to the object and back in double this time, 58 microseconds. Because our readings are in nanoseconds, this equates to 58,000 ns. We can divide our duration reading by 58,000 to return a result in centimetres.

    Build a traffic light

    We’re using this measurement for two things. First, locally it helps the driver via a traffic light system. To do this we need to define thresholds for when to change the light state between red, amber, and green. I’ve tested the code with a toy car so I’ve scaled down these values, but they are easy to change. Below 2 cm the light is red to warn the driver to stop, between 2 cm and 8 cm the amber light is shown to warn the driver to use caution, and beyond 8 cm the green light is shown.

    Completed device setup showing Azure Sphere Dev Kit, Ultrasonic Ranger in a LEGO mount and a LEGO vehicle to test the parking system

    The Azure Sphere Dev Kit has four RGB LEDs built in. Each LED has three digital channels that allow for seven possible colours. Each channel of each LED is a separate GPIO pin on the board. To make a traffic light we must be able to turn on just red, just green, or both red and green to make yellow. The IoT Hub project template for Sphere adds the led_blink_utility.c file with helper functions to simplify development with the RGB LEDs.

    The secondary use for the sensor is to report the occupied status of the parking spot to a cloud service. For simplicity, we will define this as when in amber or red states, because this indicates there is a car currently parked or manoeuvring in the space. This value will be sent to IoT Hub as a device twin property.

    Talk to Azure IoT Hub

    Right click on References and select Add Connected Service. Here you can select an Azure account and specify either the Azure IoT Hub instance or Device Provisioning Service. This will generate some code files for the project, allowing you to interact with IoT Hub. Whenever you want to report back the occupied status of the parking space to IoT Hub, you call AzureIoT_TwinReportState. You only need to send this when the state changes and not every time you take a measurement. The azure_iot_utilities.c file also contains functions to send messages and attach handlers to incoming commands or device twin requests.

    The raw JSON containing the device twin properties is displayed in the Azure portal along with the timestamp of when the property was last changed.

    Azure Device Twin showing parking bay occupied value change.

    Call to action

    The Azure Sphere SDK contains useful template projects for connecting to Azure IoT Hub and controlling onboard LEDs. By connecting external peripherals, either through the Grove Shield or using the header pins directly, you can put together powerful solutions and connect sensors and outputs securely to your IoT infrastructure. Download the full code used for the Ultrasonic Ranger

  • 12 Days of Bluetooth – #12 Summary

    Bluetooth is Big, Really Big

    Looking back over the different functionality I’ve covered in these past few posts has highlighted that Bluetooth is used for a wide range of scenarios, and it has grown massively from its simple beginnings.

    It is fair to say that looking at the evolution of each specification version that more emphasis has been placed on the Bluetooth Low Energy side. This makes a lot of sense because Bluetooth really excels in these situations where energy usage is low and the devices can be quite simple and narrow in functionality. We are surrounded by Bluetooth sensors, smart lights and beacons, let alone phones, PCs and headsets. With Bluetooth’s recent release of Auracast to enable broadcast audio over Low Energy we might see a move to more device types using new Low Energy services. On the development side, Bluetooth LE is widely support across platforms whereas there are limitations with Bluetooth Classic – such as iOS supporting only MFi certified devices.

    What Did We Just See?

    I realised part way through this series that I hadn’t planned out a table of contents to list all of the topics and so here is a reminder of all the posts in this series:-

    1. Introduction
    2. Discovery
    3. Protocols, Profiles and Services
    4. Serial Port Profile
    5. Coding Bluetooth Classic
    6. Bluetooth Classic on iOS
    7. Bluetooth Low Energy
    8. Bluetooth Low Energy in Code
    9. Pairing
    10. Hands-free
    11. Command and Control
    12. Summary (this post)

    There is still so much more that couldn’t fit into these posts so I plan to delve into so additional areas over the coming year on this blog.

    Next Steps

    Let me know if you have any feedback on 32feet.NET, the documentation, the samples or if there are any other topics you’d like me to take a more detailed look into. Probably the best way is to raise an issue in GitHub. Of course I’d welcome any contributions too, so pull requests would be gratefully received.

    Finally, throughout my career I have been connecting people to smart devices – mostly via .NET (Xamarin/MAUI/Uno) using Bluetooth, USB and other connectivity. This has allowed me to work with specialist medical devices, ensure the safety of field workers, ensure the roads get gritted and much more. If this sounds like the sort of problem I could solve for you in 2023 please get in touch and we can talk in more detail.

  • 12 Days of Bluetooth – #11 Command and Control

    When we last looked at Bluetooth Low Energy we looked at the code required to read the battery level from a device. There are two things we didn’t cover – writing values and sending commands to a device.

    Writing in the Air

    If you’re familiar with the service that you are writing to the process of writing a characteristic is fairly straightforward. The value must be passed as a byte array, the formatting of which depends on the characteristic. There are two subtly different methods of writing and you should check the properties of the characteristic to see which is supported. A normal Write operation requires an acknowledgement from the peripheral device so you can determine if/when the operation completes. For fire-and-forget operations the alternative WriteWithoutResponse method will provide a quick way to set a value. Web Bluetooth and 32feet.NET both provide separate methods for these two operations so you can clearly see which is being used.

    Command and Conquer

    The Characteristic in Bluetooth Low Energy can be though of as a Property in object-oriented programming – it has a value that supports some combination of read, write and change notification. There is no direct analogy in Bluetooth LE to a method where you may pass in zero or more arguments and receive some other value in return. However there are many third-party services which implement their own support for this using one or more characteristics.

    One of these is the Lego Wireless Protocol which is used with a range of Boost devices and the 2 port hub used in their range of trains. It does this using a single characteristic which supports write (without response) and notify operations. The hub can send you messages via the notifications and also use notifications to respond to messages you write to the characteristic. All the time there is no support for reading the characteristic value because each notification is just a snapshot and there is no logical current value.

    In order to support this service we start with the same initial steps as with the battery example – select a device, connect to the Gatt server on the device and then get the service and then characteristic to use. You do need to pair with the Hub first, however it seems quite happy to be paired with multiple devices so the Lego controller still works after pairing with a PC. The hub shows up as “HUB NO.4” to me, I’ll be honest I don’t know how this name is derived.

    To support change notifications there are two tasks – attach an event handler to the CharacteristicValueChanged event, and call the StartNotificationsAsync() method. This method hides the underlying process of writing to the ClientCharacteristicConfiguration descriptor with either the Notify or Indicate method depending on which is supported.

    When you connect to the Lego Hub it will send you a handful of HubAttachedIO messages to tell you what is connected to the ports of the hub and we can query more information about these. The type is quite helpful here as the motor reports as “SystemTrainMotor”. I’m using the Lego Passenger Train 60197 and out of the box it has only 1 port occupied with the drive motor. The second port can be used with the Lego Powered Up Lights 88005 set to add lights to the front of the train. The ports are numbered 0 and 1 in code, you may also receive messages regarding ports over 50 in index and these are reserved for internal use.

    Lego City Passenger Train Set 60197

    Each message contains a standard header of 3/4 bytes and this is then followed by specific data relevant to the type of message. The reason for the variable length of this header is that the first byte can either be used to indicate a message length of up to 127 bytes, or if it has the 8th bit set it indicates a longer length using 2 bytes (from 128 to 215). In this simple example all the packets will be relatively small so we don’t have to worry too much about this.

    The header bytes tell us the length, a hub id (always 0) and a message type. We use a switch statement on the message type to determine how to respond to each type. For each HubAttachedIO message (where the Port ID is less than 50) we send a PortModeInformationRequest message to get the name of the device attached to the port.

    The PortModeInformation message itself has multiple versions depending on the information requested so we parse the incoming name (“LPF2-TRAIN18”) then send another request for the RawRange – this will give us the minimum and maximum values we can set to the device. For the motor drive in the trainset it is -100 to 100 (with 0 being the motor at a dead stop).

    Full Steam Ahead

    In order to visualise this and provide a control mechanism the sample app has a Slider control and so once we have the range we setup the Slider control with the same range (and some labels for clarity) then use the ValueChanged event of the slider to send messages to control the motor. The PortValueSingle message changes a single value and requires the header, the port id (0 is Port A on the hub) and the value stored in 2 bytes.

    private async void Motor_ValueChanged(object sender, ValueChangedEventArgs e)
    {
       if(characteristic != null)
       {
          byte[] messageValue = new byte[6];
          messageValue[0] = 6;
          messageValue[2] = (byte)LegoMessageType.PortValueSingle;
          messageValue[3] = 0;
          BitConverter.GetBytes((ushort)e.NewValue).CopyTo(messageValue, 4);
          await characteristic.WriteValueWithoutResponseAsync(messageValue);
       }
    }

    This gives you the ability to run the train forwards and backwards (and of course stop) just by dragging the slider around. The controller which ships with the train set has three buttons for each channel which increment and decrement the value (speed in the case of the motor) and the middle button returns to zero.

    If you have added the lights, as I have, these show up on PortID 1 (Port B on the hub) and with a valid range of -10 to 10. I was intrigued to see what setting a negative value would do, sadly it didn’t change them to red, nor create a wormhole through space and time, but rather did exactly the same as the equivalent positive value.

    Sample Code

    The full sample project is on GitHub. It includes a number of useful constants and types from the Lego specification. I intend to properly work these up into a library for the Lego service.

  • 12 Days of Bluetooth – #10 Hands-Free

    Bluetooth Classic contains a handful of profiles which use AT commands to work with telephony devices over an RFComm connection. We discussed these briefly in #3 of this series and today will look in more detail and the most commonly implemented one – Hands Free Profile.

    Look No Hands!

    Two similar profiles exist in Headset Profile and Handsfree Profile. Headset was designed for devices with a single action button and mono audio.

    Hands-free Profile is more advanced and is what you’ll find in most car kits and headphone devices. It allows for more complex actions such as dialling numbers and additional audio codecs.

    What all the “AT-command” profile share is a set way of communicating over the serial connection using text commands which have a long history in the world of modems and telephony devices. We will look at some of these commands used to establish a connection later on.

    There are two separate (yet equally important) entities in the hands-free profile, the Audio Gateway (AG) which is the source of the audio (generally a Mobile Phone) and the Hands Free device which has speakers, microphone and controls which we want to operate the AG from.

    You Probably Don’t Want To Do This

    Whenever I’m asked about hands-free service I usually suggest steering clear of implementing this. In most cases your host device already has support for this profile and by establishing a connection you are potentially fighting with the OS itself. The other issue is that the audio part of the equation is handled via a separate Synchronous Connection Oriented (SCO) channel and this is handled lower in the stack than application developers normally have access to. Even in the sample program I created for this article you have to fight with Windows to ensure it is not already connected – the hands-free device won’t respond to multiple connections at the same time.

    In recent versions of Windows this built-in support for Handsfree Profile has had a public WinRT API which we can use. This means you can connect to a mobile phone and make your PC into a hands free device or speaker phone. This is how Thy Phone works with any mobile device whereas Microsoft chose to only allow Android devices with their Phone Link app. There is also support for the Windows PC to be the AG and connect to a Hands Free device such as a headset or one of these cool Fisher Price phones if you are lucky enough to have one!

    Fisher Price Chatter Telephone. Bluetooth toy rotary dial telephone.
    Fisher Price Chatter Telephone

    If the hands free device is connected in Windows settings, you’ll need to disconnect it so that it just shows “Paired” then it is ready to accept a connection.

    Windows Settings showing handsfree devices connected, with menu showing disconnect option
    Windows settings showing device as paired (not currently connected)

    The sample app performs a couple of basic operations and will not establish an audio link.

    Into The Code

    The sample app is a simple .NET MAUI app created from the new project template. The full code is available here on GitHub. I’ve changed the default button to initiate a connection following these steps:-

    • Use the BluetoothDevicePicker to present the available devices to the user to pick one.
    • If selected use BluetoothClient to connect to the Hands-free service.
    • If successful get a Stream to read from the device and respond.

    The rest of the functionality then uses a listening loop which will read blocks of data from the device as ASCII text, and process each line at a time. All messages from the Hands-free device are a single line terminated by a return character. For each command we may need to return a specific response but all have to be followed with an “OK” response (or “ERROR” but we are not doing any error checking here). For responses from the AG to the HF each message is preceded and followed by a pair of carriage return and newline characters e.g. “\r\nOK\r\n” in C#.

    To establish a connection with the HF there are a number of standard and optional queries and responses to deal with. Firstly the HF device will tell the AG device which optional features it supports from a bitmask using the +BRSF code and you must reply similarly, though you can use “BRSF:0” to support none of them.

    The listening loop checks for these core messages and responds with the default responses. To any other command it will return OK. I won’t go into every command but you can look at the source code for more detail. I will highlight a couple of interesting ones:-

    From Core to Apple

    Apple published their own extension to the hands-free profile which is now quite widely supported and it allows the hands free device to report its battery level back to the iPhone (or any device that supports the command). The HF will first send “AT+XAPL” to the AG and if you respond with “+XAPL=iPhone,2” you indicate you support this iPhone specific battery notification. There are a couple of other flags other than 2 you can specify but this is the interesting one.

    After this the HF will send you “AT+IPHONEACCEV” containing key/values depending on which notifications you showed support for. You’ll need to parse this to find the value corresponding to the key 1 and this is a digit between 0 and 9 which give you the battery level of the hands free device to the nearest 10%. There is a helper method in the sample code which shows how to get this. This isn’t as accurate as the Bluetooth LE Battery Level service we looked at before but most handsfree devices use this method. Annoyingly, although Windows has an API for working with hands-free it doesn’t expose the battery level of devices even though you can see through the Windows Settings app that it knows. You can see from the screenshot above that my Chatter Telephone is at 70% battery.

    Call Me

    The last interesting command we listen for is the one to dial a number – “ATD“. The Fisher Price phone is not the most practical in this regard because you have the inherent slowness of dialling each digit and waiting for the dial to return to start with but you have to wait a few seconds following the last digit before it sends the ATD command to the AG. In the sample app we simply parse the number and display an alert dialog to the user. You could technically use this to kick off other actions, but I can’t see it catching on as an alternative to the Stream Deck or similar!

    Final Words

    If you’ve found this interesting, please look at the full sample project on GitHub. In order to start better housekeeping of the 32feet.NET repository I’ll be updating and moving sample apps into their own repository. If you have ideas for new samples or improvements to the existing ones please open an issue so that they can be prioritised, and of course pull-requests are welcomed too.

  • 12 Days of Bluetooth – #9 Pairing

    Both Classic and Low Energy devices can provide functionality to unpaired devices or require pairing first before exchanging sensitive information. However, what exactly is pairing?

    Stick a Pin in it

    The original mechanism for pairing uses a four digit PIN code. One device would need to be discoverable, and the other device upon discovering it would initiate the pairing process. Both sides would have to enter a matching PIN number to successfully pair. The devices then exchange keys which allows their future communication to be encrypted.

    For devices without their own method of input the PIN code would have to be hard-coded – it is not uncommon to find devices with “0000” or “1234” as the PIN. While this might seem very easy to break, they have a mechanism to enable pairing mode for a limited time and so you’d have to have physical access to the device to complete the whole pairing sequence.

    More Security, More Flexibility

    A weakness of the original approach is that it was potentially vulnerable to Man in the Middle attacks (MITM). This is where a device copies and relay the exact response from the two pairing devices so that they thought that they were talking directly but really this third device has access to their encrypted communications.

    Several updates have been made to Pairing through the various Bluetooth specification releases and supporting Low Energy devices. The method that is used for pairing depends on a negotiation between the devices to determine what input and output support they have. Because the capabilities can vary widely, there are a number of available methods.

    Just Works is a basic but relatively insecure approach because it doesn’t require any user input but is quick and easy to perform. It will be used when there is limited input/output support from the peripheral device. You might find this on something like a Bluetooth mouse.

    Passkey entry requires a display on the responding device, the initiator of the pairing will be required to enter the displayed code into their device.

    Out-of-band (OOB) pairing places a required piece of information outside the Bluetooth process. This could be via an NFC tag on the responding device with a unique piece of information. This makes it very difficult for any listening Bluetooth device to get involved in the process because it could not easily have physical access to the NFC tag at the same time. This process can also be known as “tap to pair”.

    Numeric Comparison requires a device with a display to show a random 6 digit number generated using the devices keys and provide at least two buttons for a yes/no response for the user to confirm that the number matches on both pairing devices.

    Authentication, Pairing or Bonding

    Technically Pairing is the process of key exchange between devices, and Bonding is the creation of a long term link after Pairing. Authentication means that the devices have exchanged keys and can conduct encrypted communication – authentication can be short-term, and not a long-term bond. However the words can be used differently in some SDKs. The Android Bluetooth APIs refer to Bonding, Windows APIs use Pairing. Apple don’t really want you to delve too deeply and so don’t expose the pairing mechanism. In the UI these are described as “My Devices”.

    Locking Down Bluetooth LE

    When the Services and Characteristics on a Bluetooth LE are defined they can have a security requirement that the accessing device is Authenticated. This might not be on all functionality – you could have access to the device information such as manufacturer and model, but require pairing for more sensitive device data.

  • 12 Days of Bluetooth – #8 Bluetooth Low Energy in Code

    Following on from the last post, which covered the technology of Bluetooth Low Energy, this post will look at how to use it from code using InTheHand.BluetoothLE. We’re going to look at an example using a simple but widely used service – Battery Service. You can probably guess what it is used for.

    Step One – Get your device

    In the Web Bluetooth world, you must ask the user to select a device using a picker, you can provide a filter to be specific about what type of devices to present to the user. Another restriction with Web Bluetooth is that you can only connect to services which you have specified during this picking process. 32feet.NET’s implementation eases this restriction by allowing you to connect to any service and also by accessing your device either by a programmatic discovery (so you can build your own custom UI), or by using an identifier you have stored from a previous session.

    For the purpose of this example I’ll show you the simplest approach using the picker.

    Debug.WriteLine("Requesting Bluetooth Device...");
    var device = await Bluetooth.RequestDeviceAsync(new RequestDeviceOptions { AcceptAllDevices = true });

    RequestDeviceAsync will return once the user has picked a device, or if they cancel the dialog. Therefore it’s important to check if the return value is null before proceeding. RequestDeviceOptions is a class which provides filters and options to the process, but you can set AcceptAllDevices to true which takes precedence over all other options. The method returns an instance of BluetoothDevice which exposes a unique id (platform specific) and a display name. It also has the ability to connect with the GATT server on the remote device to begin working with services.

    Step 2 – Connect to a Service

    var gatt = device.Gatt;
    Debug.WriteLine("Connecting to GATT Server...");
    await gatt.ConnectAsync();

    Once you have connected you can either request all of the services from the remote device, or select a specific service from its UUID. In this case we use the UUID of the Battery Service.

    Debug.WriteLine("Getting Battery Service");
    var service = await gatt.GetPrimaryServiceAsync(GattServiceUuids.Battery);
    

    Again you need to check if the service returned is null, as the device may not support the requested service. Once we have the service we can then proceed to get the characteristic. You may remember these levels from the “tree” diagram in the previous post.

    Step 3 – Characteristics

    Debug.WriteLine("Getting Battery Level Characteristic...");
    var characteristic = await service.GetCharacteristicAsync(BluetoothUuid.GetCharacteristic("battery_level"));
    

    You’ll see in this snippet I’ve shown an alternative way of specifying the UUID for the characteristic. All of the assigned service, characteristic and descriptor ids have a name too, and the BluetoothUuid class can look these up – so you have a choice of passing one of the predefined constants (like GattCharacteristicUuids.BatteryLevel) or the text version – either “battery_level” or, more formally, “org.bluetooth.characteristic.battery_level”.

    Debug.WriteLine("Reading Battery Level...");
    var value = await characteristic.ReadValueAsync();
    
    Debug.WriteLine($"Battery Level is {value[0]} %");

    Reading the value is quite straightforward. The data is returned as a byte array and the length will depending on the specific characteristic. In the case of battery level it is stored as a percentage value (0-100) in a single byte so we can just read the first element from the array.

    The battery level, unsurprisingly, doesn’t allow the value to be written to, but you can determine the capabilities of any characteristic using it’s Properties property which is a flagged enumeration. Some capabilities of specific characteristics have optional elements so you can’t assume that all devices will behave exactly the same – you need to read the Properties, and you can also read through the relevant Bluetooth specs to find out more. For example the iPhone I’m running this sample against reports Read and Notify flags in the Properties.

    Step 4 – Get Notified

    Notify and Indicate are two special flags which support change notifications, one of the reasons why Bluetooth Low Energy is more efficient than opening a connection and polling for particular values. From a developers perspective they are much the same, the difference under the hood is that Indicate requires a response from the subscribing device (but this is something which is hidden from you in the API).

    To support notifications there is a special Descriptor value on the Characteristic which is called ClientCharacteristicConfiguration. This must be written to with a value to indicate whether to use Notify, Indicate or None for no notifications. You also need to subscribe to the CharacteristicValueChanged event. However in both Web Bluetooth and 32feet.NET this is handled for you using StartNotificationsAsync and StopNotificationsAsync so you don’t need to worry about which underlying method is used.

    characteristic.CharacteristicValueChanged += Characteristic_CharacteristicValueChanged;
    await characteristic.StartNotificationsAsync();
    
    ...
    
    private void Characteristic_CharacteristicValueChanged(object sender, GattCharacteristicValueChangedEventArgs e)
    {
        Debug.WriteLine($"Battery Level has changed to {e.Value[0]} %");
    }

    Of course you can enumerate the Descriptors or retrieve a specific one via UUID if available. There are standard Bluetooth ones defined for ranges, units and formatting of the characteristic value.

  • 12 Days of Bluetooth – #7 Bluetooth Low Energy

    In 2011, Bluetooth 4.0 was introduced and contained the biggest update to the standard yet. It introduced a whole new way of talking to Bluetooth devices which allowed them to use considerably less power. Bluetooth Low Energy works entirely separately from Bluetooth Classic but the two can coexist. For example most mobile phones will support both and expose classic services like Handsfree and low energy services like Device Information or Battery.

    A key element of Bluetooth Low Energy is to move away from the need for a continuous connection and allow devices to make distinct read and write actions and subscribe to change notifications. This has made it possible to implement tiny devices which work for months or years on a small battery. Some examples include location beacons and key fob trackers.

    New Services

    Bluetooth Low Energy introduces a new model and so a large range of defined services for common use cases. As with Bluetooth Classic, those which are approved by the Bluetooth SIG have a short id code and the specifications are available online. You can however define your own custom service (with your own unique id) if you are building a specific device. You may keep this implementation entirely to yourself, or like Apple and Lego, you could publish a specification for others to use. All Low Energy services are based on the Generic Attribute Profile (known as GATT).

    GATT Services can be visualised as a tree – each service can have one or more Characteristic and each Characteristic one or more Descriptors e.g.

    Bluetooth Service (0x180F)
        Battery Level Characteristic (0x2A19)
            Characteristic Presentation Format Descriptor (0x2904) (optional)
            Client Characteristic Configuration (0x2902) (used for notifications)

    A Characteristic is an individual logical property supported by the service. Some services may only contain a single characteristic, other many. Some services may define optional characteristics which are not present on all devices. From a GATT Service you can use an API to either request a specific characteristic by id or request enumeration of all characteristics. Each characteristic may support Read, Write and Notify functionality. The characteristic exposes a Properties value which contains a mask of all the supported operations. It only makes sense for a device to support notifications if the value is likely to change over time – device manufacturer wouldn’t, but the battery level or weight on a scales definitely would. The Write operation may support one or both of WriteWithResponse or WriteWithoutResponse. As the name suggests WriteWithoutResponse is a fire-and-forget operation and you won’t know if or when the operation completed successfully. The Properties value of the Characteristic will tell you which is supported.

    The Descriptor provides additional information about the characteristic. This can often be to describe the units the value is presented in and other display properties so that the requesting device knows how to make sense of the raw bytes. There is a special Client Characteristic Configuration Descriptor which is used to support change notifications – the calling device must write a value to this in order to receive notifications on a specific characteristic. There is no subscribe to all functionality – you request separately for each characteristic.

    Overwhelmed by Advertising

    Bluetooth Low Energy devices broadcast packets, called Advertisements, both as a mechanism to support discovery but also use these to broadcast data themselves. This can be related to a specific service or a manufacturer specific chunk of data. In this way it’s possible to get data from a low energy device without ever establishing a connection. This form the basis of beacons which are constantly broadcasting a unique identifier which can be used to establish a location (especially when multiple beacons are used together).

    Strangely there isn’t an official Bluetooth standard for beacons, but there are multiple implementations in use. Apple devised the iBeacon standard, Eddystone was Google’s implementation – they achieve similar ends but Eddystone supports additional data alongside the unique id. There are some lesser know implementations including URIBeacon which broadcasts a Url rather than an id. It’s possible for a single beacon device to broadcast multiple formats.

    While there is a lot of potential for broadcasting data like this in the advertising packet, it’s important to remember that it is completely public and so not appropriate for all types of devices.

    What a Mesh!

    Following on from Bluetooth Low Energy another standard was created to allow smart devices to communicate between themselves and form a mesh. This is used for smart lighting and other groups of devices and sensors. Devices can send messages out into the mesh which are relayed around to reach further and more reliably than with individual Bluetooth Low Energy communication between two devices.

    Bluetooth LE and .NET

    APIs are available natively on all the platforms .NET runs on, but of course these APIs vary dramatically. 32feet.NET has an implementation for Windows, Android and Apple OSes which follows the Web Bluetooth API model. It currently contains all the client-side functionality described above. Obviously it would be great to eventually extend this to Linux and Tizen as well as add server side functionality to host services and customise advertisements.